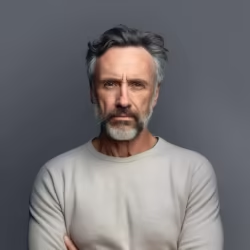
A practical culling workflow for photographers: remove technical misses, compare expression and gesture, protect variety, avoid over-selecting, and organize final selects.
To choose the best photos from a photoshoot, work in passes: first remove clear technical misses, then compare similar frames for expression, gesture, and timing, and finally check the set for variety, story, and client needs. Do not judge every image by sharpness alone; a technically imperfect frame can still matter if the moment is stronger than the cleaner alternatives.
Good culling is not one big yes-or-no decision. It is a sequence of smaller choices that narrows the shoot without losing the story.
Photo culling decision table
Pass
What to check
What to keep
Technical pass
Focus, severe blur, exposure, accidental frames, blocked faces
Images that are usable or emotionally strong enough to review again
Images that serve the shoot purpose without padding the final set
First pass: remove technical misses
Start with the easy no decisions. Remove accidental shots, true focus misses, severe motion blur, unusable exposure, duplicate misfires, and frames where the subject is blocked in a way that cannot be saved. Keep this pass fast; the goal is to clear visual noise, not to make final artistic decisions.
Reject images that are clearly out of focus on the intended subject.
Reject severe camera shake or motion blur unless the moment is uniquely valuable.
Remove accidental shutter presses, test frames, floor shots, and setup frames.
Flag exposure problems that cannot be recovered cleanly in editing.
Set aside frames with closed eyes, awkward transitions, or blocked faces when better versions exist.
Keep uncertain images for a second pass instead of deleting originals too early.
The technical pass should remove obvious misses, but it should not erase emotionally important moments too quickly.
Second pass: compare expression, gesture, and moment
Once the obvious rejects are gone, compare similar photos side by side. This is where strong selections usually happen. Look for relaxed hands, natural posture, clean eye direction, emotional timing, and the frame where the subject feels most like themselves.
For portraits, choose expressions that feel natural, confident, and flattering.
For weddings, protect emotional reactions, small gestures, and family moments even when they are not perfectly posed.
For events, choose frames that explain what happened and show real interaction.
For street or documentary work, favor timing, gesture, layers, and context.
For portfolio shoots, choose images that show range without repeating the same pose.
When two frames are close, pick the one with stronger eyes, hands, posture, or emotional clarity.
Expression and gesture often decide between technically similar frames.
Third pass: check variety, story, and client needs
A strong final selection is not just a pile of individual favorites. It should give the client enough variety to understand the shoot: wide scenes, closer portraits, details, transitions, quiet moments, and key deliverables. Remove good photos if they repeat a stronger image too closely.
Build a mix of wide, medium, close-up, detail, and environmental frames.
Match the selection to the brief: headshots, wedding story, event recap, portfolio range, or editorial sequence.
Check that important people, outfits, locations, products, or moments are represented.
Avoid sending ten nearly identical versions of the same pose or scene.
Keep a few alternate crops or orientations only when they serve a real use.
Review the set once as a story before marking it final.
The best final set balances strong individual photos with the larger story of the shoot.
How to avoid over-selecting
There is no fixed keeper percentage that works for every shoot. A short headshot session, a long wedding day, and a street photography walk all need different selection sizes. The better rule is to remove repetition until each photo earns its place.
Group similar frames before choosing, so you compare like with like.
Limit yourself to the best one or two images from each repeated pose or moment.
Take a break before the final pass so attachment to the shoot does not inflate the set.
Ask whether each image adds information, emotion, variety, or client value.
Create a separate maybe group instead of pushing uncertain images into the final delivery.
Do not delete original files too early; archive them until the project is safely complete.
Mistakes beginners make when choosing photos
Keeping every sharp image even when the expression, pose, or story is weak.
Rejecting a meaningful candid only because it is not technically perfect.
Sending too many duplicates because choosing between similar frames feels uncomfortable.
Ignoring the client goal and selecting only personal favorites.
Choosing photos while tired, rushed, or emotionally attached to how hard the shoot felt.
Deleting originals before the client has approved or received the final project.
After culling, organize final selects clearly before editing, proofing, or delivery.
Use Gampi after your selection pass to organize galleries, present finished work, and keep the final handoff simple for clients.
Frequently asked questions
How do photographers choose the best photos?
Photographers usually work in passes: remove technical misses, compare similar frames for expression and moment, then check the final set for variety, story, and client needs.
How many photos should I keep from a photoshoot?
There is no universal keeper percentage. Keep enough images to tell the story and meet the client brief, but remove duplicates and weak frames that do not add value.
What is photo culling?
Photo culling is the process of reviewing a shoot and narrowing it down to the strongest images before editing, proofing, or delivery.
Should clients choose photos or should the photographer choose?
It depends on the workflow. Photographers often remove technical misses first and provide a polished proof set, then clients may choose favorites for retouching, albums, or final delivery.
How do I stop over-selecting photos?
Compare similar frames side by side, keep only the strongest versions, use a maybe group, take a break before the final pass, and ask what each image adds to the set.