كيفية جعل الأشخاص يقفون بشكل طبيعي في الصور
دليل عملي وشامل لمساعدة العملاء والأزواج والأصدقاء والعارضين والمجموعات على الشعور بالراحة والظهور بشكل طبيعي في الصور.
نصائح التصوير
6 دقيقة للقراءة

تم النشر ٨ يوليو ٢٠٢٦ | 10 دقيقة للقراءة
لتمركز في تصوير الاستوديو، ابدأ بوضعية مريحة، تنفس سهل، ونية واضحة واحدة للإطار. قم بتدوير الكتفين قليلاً بدلاً من الوقوف بشكل مربع كعادة، احتفظ باليدين مشغولتين قليلاً، اجلب الذقن للأمام قليلاً بدلاً من رفعها بشكل حاد لأعلى أو لأسفل، ودع العيون تختار مكاناً محدداً: العدسة، الضوء، كتف المصور، أو الأرض لإعادة الضبط. لا تعمل وضعية واحدة مع كل شخص. تمركز الاستوديو هو تفاوض صغير بين الوضعية، الضوء، الملابس، الحركة، الشخصية، وهدف الصورة.
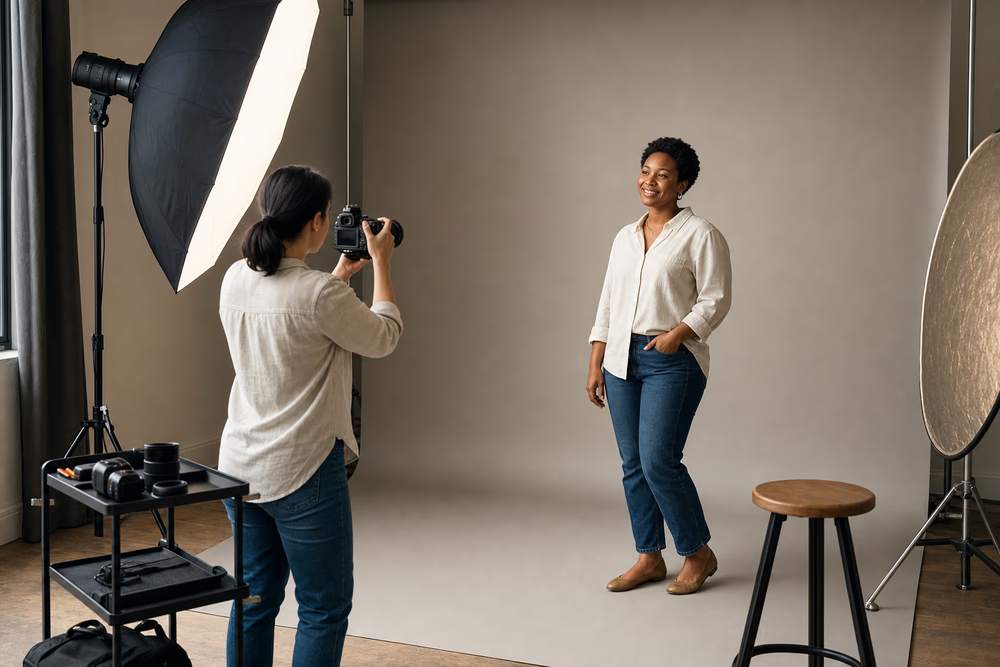 يبدو تمركز الاستوديو أسهل عندما يفهم الموضوع الضوء، الإشارة التالية، ولماذا تغير بسيط يغير الصورة.
يمكن أن تستمد الصور الخارجية والعفوية طاقتها من الرياح، المشي، المحادثة، العمارة، واليوم المحيط. الاستوديو أكثر نقاءً. الخلفية بسيطة، الضوء متحكم فيه، وكل عادة صغيرة تصبح مرئية: الأيدي المتوترة، التنفس المحتجز، الكتفين المرفوعتين، الرقبة المخفية، الجذع المنهار، النظرة المتجولة، أو الابتسامة المحتفظ بها لفترة طويلة جداً. قد تبدو تلك الدقة صارمة في البداية، لكنها أيضاً كريمة. يمنحك الاستوديو الوقت لضبط تفصيل واحد في كل مرة.
اختلاف الاستوديو | ما يغيره | خطوة عملية للتمركز |
|---|---|---|
ضوء متحكم فيه | تغيرات صغيرة في الوجه تغير الظل، الضوء المنعكس، وشكل الفك. | قم بتدوير الأنف أو العيون بإنشات، ثم دع المصور يتحقق من الضوء. |
خلفية بسيطة | تصبح الوضعية واليدين أكثر وضوحًا لأنه يوجد ضجيج بصري أقل. | اجعل كل يد لها وظيفة هادئة: جيب، حافة سترة، مقعد، شعر، كوب، أو حضن. |
إيقاع أبطأ | قد يفرط الموضوع في التفكير في الكاميرا بين الإطارات. | أعد الضبط كثيرًا بالتنفس، النظر بعيدًا، تدوير الكتفين، أو خطوة صغيرة. |
مراجعة متصلة | قد ترى إطارات قوية وضعيفة خلال التصوير. | استخدم المراجعة للمعايرة، وليس النقد الذاتي؛ ابحث عن ما يعمل. |
قليل من الدعائم | كل كرسي، مقعد، مكعب، أو سترة تحمل مسؤولية بصرية أكبر. | استخدم الدعائم للدعم ووضع اليدين، وليس كتمويه. |
بالنسبة لوضعيات تصوير الاستوديو الواقفة، أبسط بداية موثوقة هي تغيير وزن خفيف. ضع قدمًا واحدة قليلاً للأمام أو دع ركبة واحدة تضعف، ثم قم بتدوير الكتفين قليلاً بعيدًا عن الكاميرا. هذا يمنح الصورة بعض الميل دون إجبار الجسم على شكل مصطنع. يمكن أن ترتاح اليدين في الجيوب، تمسك بحافة سترة، تلمس كمًا، تستقر على الورك إذا كان ذلك يناسب الموضوع، أو تتدلى بشكل طبيعي بعد التخلص من التوتر. الهدف ليس إخفاء الجسم؛ الهدف هو إبقاء الوضعية حية.
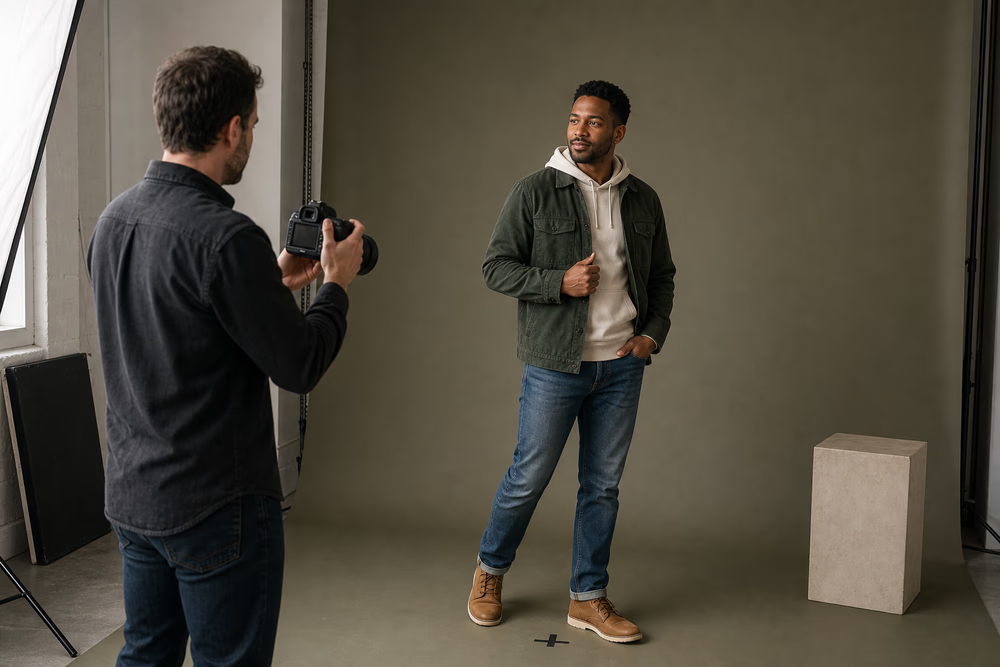 بالنسبة للصور الكاملة للجسم في الاستوديو، حدد القدمين أولاً، ثم قم بتحسين الكتفين، اليدين، الذقن، والعيون بتغييرات صغيرة وقابلة للقراءة.
غالبًا ما تحتاج وضعية الاستوديو الجالسة إلى رفع قليل، ولكن ليس بصلابة عسكرية. الجلوس بالقرب من الحافة الأمامية لمقعد أو كرسي يمكن أن يساعد الجذع على البقاء يقظًا. يمكن أن يجعل تدوير الكرسي الوضعية أقل مباشرة. يمكن أن ترتاح اليدين على الركبتين، حواف الكرسي، القماش المطوي، أو بعضها البعض. إذا كان لدى الموضوع حركة محدودة، ألم، تعب، أو وضعية مفضلة للجلوس، قم ببناء الوضعية حول الراحة أولاً واستخدم الضوء، ارتفاع الكاميرا، والقص لتشكيل الصورة.
 تحسن الوضعية الجالسة بسرعة عندما يكون لليدين اتصال خفيف ويغير المصور تفصيلًا واحدًا في كل مرة.
مشكلة الجلوس | حل لطيف | لماذا يعمل |
|---|---|---|
الجذع ينهار في الكرسي | اجلس بالقرب من الحافة الأمامية أو انحن للأمام من الوركين إذا كان ذلك مريحًا. | تكتسب الصورة حضورًا دون إجبار العمود الفقري على الصلابة. |
تبدو اليدين معزولتين | استرح عليهما على الركبتين، حافة الكرسي، الحضن، السترة، أو دعامة بسيطة. | الاتصال الخفيف يمنح اليدين سببًا للوجود. |
الوجه يدير بعيدًا عن الضوء الرئيسي | قم بتدوير الكرسي أو اطلب تغييرًا طفيفًا في الأنف نحو الضوء. | تلتقط العيون وعظام الخد مزيدًا من الإضاءة القابلة للقراءة. |
التعبير يصبح ثابتًا | انظر بعيدًا، تنفس، ثم عد إلى الكاميرا. | يعيد الفم والعيون الضبط قبل الإطار التالي. |
الكرسي يبدو رسميًا جدًا | استخدم مقعدًا، صندوق تفاح، مكعب تمركز، وسادة أرضية، أو ميل واقف بدلاً من ذلك. | يجب أن تدعم الأثاث الشخص، وليس أن تفرض شخصيته. |
في صور الاستوديو القريبة، ليس الوجه هو الموضوع الوحيد. تؤثر الكتفين، الياقة، اليدين بالقرب من الوجه، الشعر، خط العنق، والمساحة السلبية جميعها على الصورة. اجلب الذقن قليلاً للأمام لتمديد مستوى العنق، ثم اضبط لأعلى أو لأسفل فقط حسب الحاجة للضوء والعدسة. يجب أن تكون التعليمات صغيرة، تقريبًا مثل الطهي: رشة للأمام، نفس أقل، عيون إلى اليسار بوصتين، فم مسترخٍ، كتفين لأسفل عند الزفير. تجعل الأوامر القاسية الوجوه محروسة؛ تجعل الإشارات الدقيقة منها مرنة.
لا يجب أن تبدو صور الاستوديو متجمدة. يمكن أن تخفف الحركة الصغيرة من الإدراك الحسي وتمنح الموضوع مهمة بجانب أن يتم النظر إليه. اطلب خطوة بطيئة للأمام، تعديل سترة، دوران بعيد ثم العودة، ميل جالس للأمام ثم للخلف، تدوير الكتفين، أو تغيير النظرة من الأرض إلى العدسة. تعمل تحفيزات الحركة بشكل أفضل عندما يصف المصور الفعل، ويظهره إذا كان مفيدًا، ويصور خلال الانتقال بدلاً من الانتظار حتى يتوقف الموضوع.
تحفيز | استخدمه من أجل | راقب |
|---|---|---|
خذ خطوة بطيئة واحدة وتوقف على القدم الأمامية. | صور كاملة للجسم وصور العلامة التجارية الشخصية. | لا تدع اليدين تتصلبان بينما تتحرك القدمين. |
قم بتعديل حافة سترة، ثم انظر إليّ. | اليدين، الملابس، والعودة الطبيعية للعين. | احتفظ بالتعديل خفيفًا حتى لا يبدو كأنه مشكلة في الملابس. |
قم بتدوير كتفيك بعيدًا، ثم أعد فقط عينيك. | صور قريبة وتعبيرات أكثر هدوءًا. | تجنب الالتواء بما يتجاوز ما يشعر بالراحة. |
اجلس للأمام، تنفس، واستقر يديك. | صور رأسية جالسة وصور تحريرية. | تحقق من أن الرقبة والكتفين لا يزالان مرتاحين. |
انظر إلى الضوء لإطار واحد، ثم إلى العدسة للإطار التالي. | تنوع التعبير دون تغيير الوضعية بالكامل. | تأكد من أن الأضواء المنعكسة لا تزال مقصودة. |
معظم مشاكل تمركز الاستوديو ليست مشاكل كبيرة. إنها تراكمات صغيرة: يد بلا وظيفة، كتفين محبوسين بالقرب من الأذنين، ذقن مسحوبة للداخل، وضعية منهارة، أو عيون بلا وجهة. للحصول على لغة تمركز طبيعية أوسع، اجمع هذا الدليل مع كيفية تمركز الأشخاص بشكل طبيعي في الصور و نصائح تصوير البورتريه للحصول على صور أفضل للعملاء.
المنطقة | إشارة مفيدة | تجنب |
|---|---|---|
اليدين | امنحهم اتصالًا خفيفًا: حافة جيب، كم، مقعد، حضن، شعر، سترة، أو دعامة. | أيدٍ عائمة، قبضات مشدودة، أصابع مخفية، أو كلتا اليدين تفعلان نفس الشيء المحرج. |
الكتفين | تنفس ودعهم ينزلون، ثم قم بتدويرهم قليلاً إذا كانت الصورة تحتاج إلى شكل. | إخبار شخص ما بالاسترخاء بشكل متكرر دون إعطاء إجراء قابل للاستخدام. |
الذقن | اجلبها قليلاً للأمام، ثم اضبط لأعلى أو لأسفل بخطوات صغيرة. | تكتلات الذقن الدرامية المستخدمة كقاعدة عالمية. |
الوضعية | فكر في الطول والراحة، وليس الاستقامة الصلبة. | مساواة الوضعية الجيدة بعدم الراحة أو نموذج جسم ضيق واحد. |
العيون | اختر هدفًا دقيقًا: العدسة، الضوء، الكتف، الجدار الجانبي، الأرض، أو إعادة الضبط المغلقة. | ترك النظرة تتجول دون نية. |
التعبير | غير التعبير في فترات قصيرة وأعد الضبط كثيرًا. | الاحتفاظ بنفس الابتسامة أو النظرة الجادة حتى تصبح متجمدة. |
توجيه الاستوديو الجيد محدد، واعٍ للموافقة، وغير مستعجل. قم بإظهار وضعية على جسمك قبل الطلب منها. غير شيئًا واحدًا في كل مرة. وصف هدف الصورة بدلاً من تقييم جسم الشخص. اسأل قبل الاقتراب، تعديل الشعر، تسوية الملابس، أو لمس أي شيء. سيثق بك العديد من العملاء بشكل أسرع عندما يسمعون ما تنظر إليه: الضوء على العيون، أيدٍ أنظف، زاوية كتف أقوى، مزيد من مساحة التنفس حول الإطار.
خطأ | لماذا يؤذي الصورة | إصلاح |
|---|---|---|
البدء بوضعية معقدة | يمتلك الموضوع الكثير من التفاصيل لتذكرها قبل أن يشعر بالاستقرار. | ابدأ بالقدمين، التنفس، والنظرة؛ ثم قم بتحسين اليدين والذقن بعد ذلك. |
استخدام وضعية واحدة للجميع | تختلف الأجسام، الحركة، الشخصية، الملابس، وأهداف الصورة. | قدم عائلات الوضعيات بدلاً من نموذج واحد: الوقوف، الجلوس، الميل، اللقطة القريبة، الحركة. |
استدعاء توجيهات حساسة للجسم على أنها مفيدة | يجعل الناس يشعرون بالوعي الذاتي ويمكن أن يقطع الثقة. | تحدث عن الضوء، الخط، المساحة، الاتصال، والتعبير بدلاً من حكم الجسم. |
لمس للتعديل دون موافقة | يمكن أن يشعر بالتطفل وعادة ما يكون غير ضروري. | استخدم الإشارات اللفظية، أو أظهر على نفسك، أو اطلب الإذن قبل أي تعديل. |
تجاهل الضوء أثناء التمركز | يمكن أن تفشل وضعية جيدة إذا ترك الوجه الضوء القابل للاستخدام. | قم بالتمركز نحو الضوء الرئيسي، ثم اضبط زاوية الكاميرا أو الإضاءة. |
الإفراط في تصوير تعبير محتفظ به | تصبح العيون والفم متوترين. | استخدم فترات قصيرة، إعادة ضبط النظر بعيدًا، التنفس، وتحفيز الحركة. |
ترك اليدين تعكسان بعضهما البعض بشكل متصلب | يمكن أن يبدو الجسم مصطنعًا ولكن ليس مأهولًا. | امنح كل يد مستوى مختلف من الاتصال أو الضغط. |
بعد جلسة الاستوديو، عادةً ما تتضمن المجموعة النهائية الأقوى نطاقًا: صورة شخصية مباشرة، نظرة أكثر نعومة خارج الكاميرا، إطار جالس، إطار كامل للجسم، صورة واحدة تعتمد على الحركة، وتفصيل أو قص إذا أضاف معنى. قارن النسخ القريبة من حيث اليدين، التعبير، توتر الكتف، وطاقة العين قبل تسليم المعرض. لتمرير تحرير أكثر تفصيلاً، اقرأ كيفية اختيار أفضل الصور من جلسة تصوير.
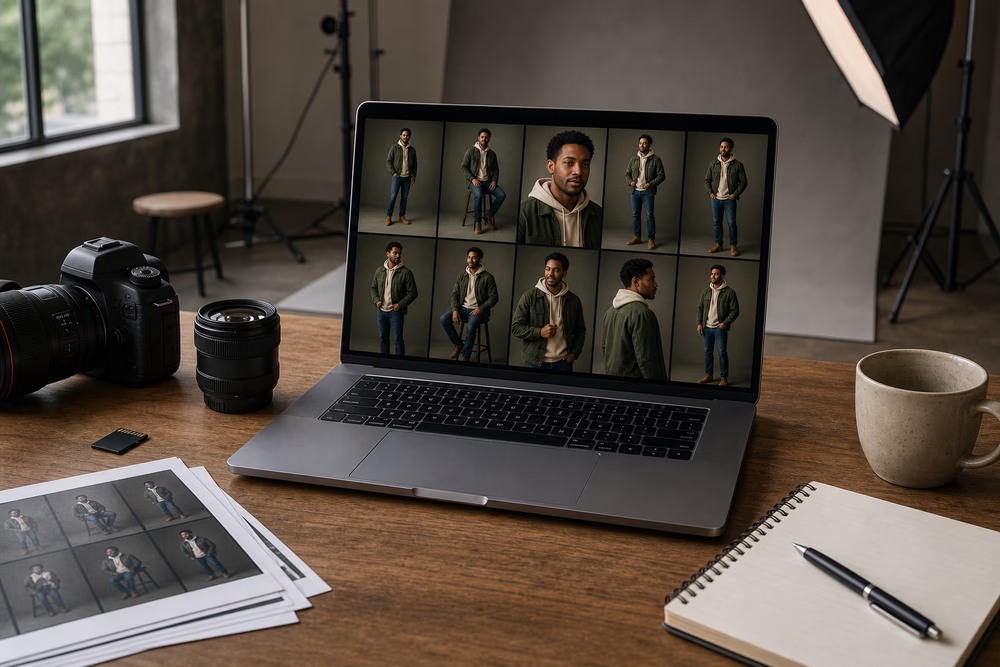 تقييم تنوع وضعيات الاستوديو أسهل عند المقارنة. ابحث عن اليدين، الوضعية، التعبير، وما إذا كانت المجموعة تشعر كأنها الشخص، وليس فقط الإعداد.
بمجرد اختيار أقوى الصور الواقفة، الجالسة، القريبة، والحركية، استخدم Gampi لترتيب تسليم معرض أو محفظة نظيفة دون إرباك العميل بكل نسخة قريبة.
ابدأ بوضعية مريحة أو مقعد، تنفس، قم بتدوير الكتفين قليلاً، امنح اليدين اتصالًا خفيفًا بالملابس أو دعامة، واختر هدفًا واضحًا للعيون. دع المصور يضبط تفصيلًا واحدًا في كل مرة بناءً على الضوء وهدف الصورة.
امنح يديك وظيفة بسيطة: استرح بأطراف الأصابع في جيب، امسك بحافة سترة، المس المقعد، استقر في حضنك، عدل كمًا، أو لمسة خفيفة لشعرك إذا كان ذلك يشعر بالطبيعية. تجنب قبضات مشدودة أو إخفاء اليدين بالكامل ما لم تتطلب التركيبة ذلك.
تأتي الصور الطبيعية في الاستوديو من إعادة الضبط الصغيرة: تنفس، انظر بعيدًا، تحرك برفق، دع الفم يسترخي، وارجع إلى الكاميرا فقط عندما تكون جاهزًا. تبدو الوضعية أكثر طبيعية عندما تتناسب مع راحتك، ملابسك، حركتك، وشخصيتك.
تشمل الوضعيات المناسبة للمبتدئين الوقوف مع تغيير وزن خفيف، الجلوس بالقرب من الحافة الأمامية لمقعد، الميل برفق على مكعب تمركز، إمساك سترة أو كم، النظر نحو الضوء الرئيسي، وأخذ خطوة بطيئة قبل التوقف.
يمكن للمصورين المساعدة من خلال شرح الجلسة، إظهار الوضعيات على أنفسهم، إعطاء إشارة واحدة في كل مرة، استخدام لغة محترمة، طلب الموافقة قبل التعديلات الجسدية، وإظهار إطار قوي مبكرًا عندما سيبني الثقة.
دليل عملي وشامل لمساعدة العملاء والأزواج والأصدقاء والعارضين والمجموعات على الشعور بالراحة والظهور بشكل طبيعي في الصور.
دليل عملي لوضعيات بورتريه طبيعية في الشوارع: المشي، الميل، الجلوس، الأيدي، الحقائب، أسطح المدينة، الاتجاه الهادئ، ووعي الفضاء العام.
استخدم هذه النصائح العملية لمساعدة العميل على الارتياح، واختيار ضوء أفضل، وتوجيه وضعيات طبيعية، وإنتاج صور نهائية أنظف.